Pressure Cooker

Vegan Month of Food Logo

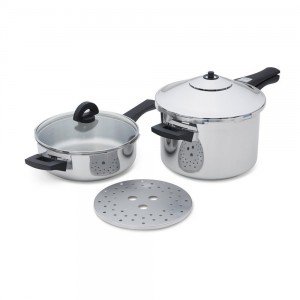
My pressure cooker is a Kuhn Rikon, purchased 10-15 years ago. It came as a set with a 2L “frying pan” 5L pot, 1 pressure lid, 1 glass lid, and steamer insert. At the time, I thought it very expensive for a pressure cooker and was hesitant to make the purchase, but it’s been a great investment. It’s very similar to this one on amazon.com. The glass lid design has changed slightly, and the price has gone up.

Kuhn Rikon Set

With the possible exception of the saucepan I use for cooking oatmeal, I use the pressure cooker more often than any other cooking pot/pan/appliance in my kitchen. Probably more than all the others combined…except for that saucepan. Over the years I’ve replaced both the rubber gasket and UL valve once, and I once broke a clip on the valve housing when I hurriedly pulled it off with one hand, so that’s been replaced too. There are a few places that sell Kuhn Rikon replacement parts. Three in the USA are Pleasant Hill Grain, Shar’s Kitchen, Factory Direct 2. I don’t remember where I purchased mine.

Most pressure cooker instructions say not to cook rice, but I’ve cooked rice often with no problem. I usually soak wild rice, and sometimes brown rice first, similar to legumes.

I also frequently make one pot stews in the pressure cooker. Sauteing onion, garlic and spices, then adding soaked beans and rice, bringing the pressure up and cooking for 20-30 minutes (that will probably be 10-15 minutes at sea level). I let the pressure naturally release, then add vegetables. If the vegetables don’t need to cook long, I’ll simmer for a few minutes with the glass lid. For longer cooking vegetables like potatoes and carrots, I’ll cook beans/rice for half to two-thirds the needed cooking time. Release pressure, add potatoes or carrots, bring the pressure back up and cook for a few more minutes.

I nearly always cook potatoes in the pressure cooker. I use the steaming insert and only a little bit of water. I’ll make another post about cooking potatoes with a few more instructions about that in a few days.

Bean (Legume) Cooking 101

Vegan Month of Food Logo

The Vegan RD says we need at least three servings of legumes and soy foods per day. When I’m eating well, I cook a pot of beans nearly every day. Even though I’m a lazy cook I nearly always cook fresh (or rather dry beans) rather than using canned for three main reasons:

  1. They’re cheap
  2. They aren’t high in sodium
  3. Most importantly, I don’t like the taste of canned beans!

Because I live at 9000ft/2700m elevation I pretty much have to use a pressure cooker for cooking dry beans. I think it’s a good method at any elevation. That said, don’t use my cooking times, I generally double the recommended cooking times compared to someone at sea level. My pressure cooker instruction booklet has guidelines for adjusting for elevation. If you aren’t at sea level you might look for similar guidelines for your cooker.

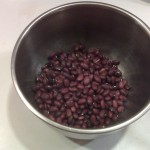
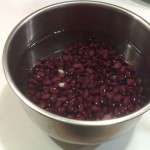
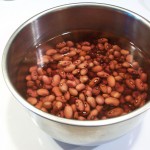
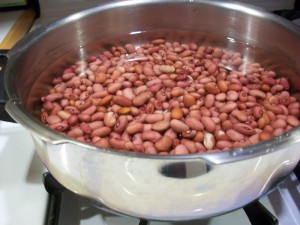
It’s easiest, and best, to soak the beans overnight. When soaking dry beans there should be enough water in the bowl so the beans can at least double in volume. Some varieties will expand more than this. Your bowl should accommodate at least triple the volume of the dry beans (quadruple for Limas) so the beans aren’t all over your kitchen counter in the morning.

dry red beans
Dry beans
red beans ready to soak
Cover with 2X water
red beans after soaking overnight
After soaking overnight

The quick way: For many reasons not as good as an overnight soak, but if you’re having a bean emergency, put beans and plenty of water in the pressure cooker. Bring up pressure, then turn off the heat and let the pressure come down using the natural release method. No, you cannot save time and cold-water release in this case.

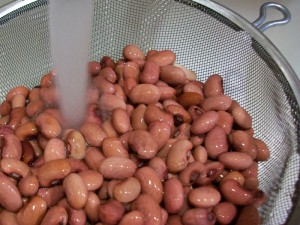
Rinse the soaked or pre-cooked beans well. You should probably check for rocks/pebbles too, if you didn’t already. If you soaked overnight, any clumps of sand/dirt should have dissolved so they’ll rinse away.

rinse beans well
Rinse well!

Put the beans in the pressure cooker and cover with about twice as much water. Bring up the pressure and then turn the heat to low. Depending on your stove you may need to double-up grates so the pressure doesn’t continue to build. Cooking time will vary with the type of bean. Pintos, red, black, white, kidney all have a similar cook time. Garbanzo’s take longer. Most Limas cook very quickly and are easy to overcook. Check your pressure cooker manual.

cover beans with water
Cover beans with water

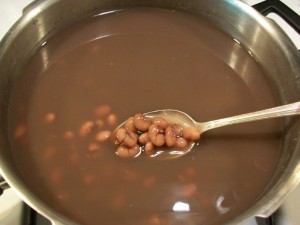
After the prescribed cooking time, turn off the heat and let the pressure drop naturally. The beans will continue to cook during this time. When your cooker has depressurized, you can remove the lid, and you’ll have a nice pot of unseasoned beans.

cooked unseasoned red beans
Cooked and unseasoned

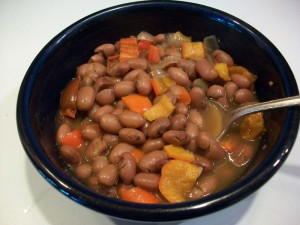
Lately, I’ve been simmering my beans most of the day and tweaking for each meal. If I’ve started early enough I may have a serving for breakfast. For this batch I added a little beer (wine is good too), a veggie bouillon cube, a little dry basil, onion, sweet pepper and 4-5 cherry tomatoes. This was lunch.

red beans with peppers
Red beans with onions, peppers and tomatoes

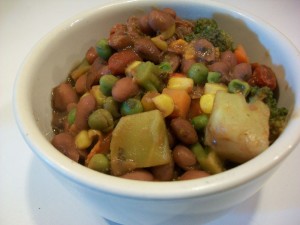
By dinnertime the flavors had really concentrated, and I needed more veggies for the day, so I added frozen broccoli and mixed veggies and simmered 10-15 min. Lunch was a little more soup like. This is basically a veggie, bean stew.

round 2 red beans with more veggies
Red beans with pepper, broccoli, corn, peas and carrots

I usually don’t cook the same type of beans two days in a row. My regulars are pinto, northern white, red, kidney, black. Occasionally I’ll have Lima or garbanzo. I also vary the basic seasonings from day-to-day, with a rough pattern of beer/wine (if I have any I need to use up), veggie bullion and spices. Cumin, basil, oregano, tumeric, paprika, chili powder, thyme, rosemary, sage are some I use frequently. Not all together. I like to add some sort of flavorful vegetable if I have anything. Partially dried tomatoes, peppers (sweet or hot), onion are good choices. A good combo is beer and chipotle pepper, dried or from a can. Anyway, there are endless varieties. Try some of your favorite things. And, if you’re like me, you’ll never have exactly the same thing twice.

Quinoa, Tempeh, Green Bean, Brocoli Stir-fry

Vegan Month of Food Logo

My favorite sort of meal. One that requires 15 minutes or less of kitchen time.

Put quinoa in saucepan with water. Cover with lid. Place over low-low heat and go back to work. To accomplish low-low heat I use a trick I learned from a friend’s husband and stack two grates over a low flame on my gas stove. He probably likes to stand over the stove as much as I do.

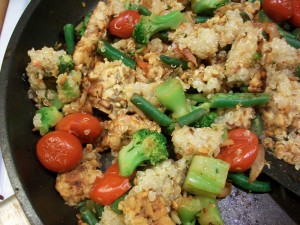
After an hour or so return to the kitchen and remove the quinoa from heat. In a non-stick pan over medium heat, pour a little (~1 tsp) olive oil in non-stick pan. Cross-hatch onion and “chop” into pan (~2 tbsp). Add 2-3 dried celery leaves if you have them, a dash of tandoori spice mix (or chili powder or something else with a little “heat” that you like) and a dash of cumin (or some other spice you have/like). Chop 1/4-1/3 of a block of tempeh into pan. Pour a little soy sauce into pan trying to hit the tempeh. Add frozen green beans and frozen brocoli. I happened to have some partially dried cherry tomatoes (a tip from Lynne Rossetto Kasper of “The Splendid Table) and threw a few in. If you have tomatoes or carrots or other vegetables, frozen or fresh, you could add some of those to the mix if you’d like. Add 1/2-3/4 c. of quinoa. Stir everything and try to break up the quinoa clumps if yours is overcooked and mushy like mine. Squeeze a little lime juice over everything (you could substitute lemon juice or a little vinegar) and a few more dashes of soy sauce in the general direction of the quinoa clumps. This is the final product.

Quinoa, Tempeh Brocoli Stir-fry

Note: My “recipes” are guidelines and amounts are estimates. The goal is to use whatever you have on hand and to use as few dishes, pots and utensils as possible. Oh yeah, and to wind up with something edible for dinner.

Spicy pinto bean breakfast

So my morning went like this:

  • Coffee
  • Apple Pie Lara Bar (I don’t often eat Lara Bars, but Vitamin Cottage had them on sale a few weeks ago, thus they’ve appeared twice in two days.)
  • Get road bike ready to go
  • Dress
  • Take Bonnie for a 30 min ride around the neighborhood with the mountain bike (exercise for her, warm-up for me)
  • 4 x 4 min/2 min intervals on road bike, planned 6 x, but power dropped significantly on #4
  • 8 min Crossfit AMRAP 7 back squats, 7 chest-to-bar (w/ assistance band for me)
  • Spicy pinto beans on toast

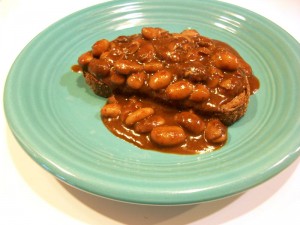
Spicy pinto beans on toast

The spicy pinto beans were not all that spicy, but it’s a more interesting title. I had some pinto beans leftover from yesterday that I’d simmered for a few hours with 1/2 c. beer, 1 veggie boullion cube and a few cherry tomatoes. This morning I added about 1/4 c. red sauce leftover from a tamale dinner I’d made for friends a few weeks ago. I simmered that over very low heat for about 15 min then poured over toast. A corn tortilla would probably be more appropriate, but I didn’t have any. And pinto beans over toast always reminds me of one of my favorite childhood meals; pinto beans over toast with ketchup!

This is the recipe I use for red sauce. It’s the “Classic New Mexico Red Chile Sauce” in Hot and Spicy Meatless by Dave Dewitt, Mary Jane Wilson and Melissa T. Stock. I’ve had it about 15 years and it’s one of my favorite cookbooks. Not all recipes are vegan, but most that are not can easily be made so, especially now that we have Daiya.

10-12 dried whole New Mexican red chiles
1 large onion chopped
3 cloves garlic chopped
3 c. water

Toast chiles in 250° F oven for 10-15 min. Crumble chiles into sauce pan. I usually use a big stovetop wok. Add other ingredients and bring to a boil. Simmer 20-30 min. Puree in blender until smooth. Simple, yummy, perfect red sauce!