Randonneur rice bars

Vegan Month of Food Logo

Today a recipe for my infamous vegan rice bars. It’s based on Allen Lim’s rice cakes. I often take 1-3 of these on brevets. It’s nice to have a break from packaged energy bars and Twizzlers.

Moist Vegan Rice Bars

  • 1 c. sushi rice
  • 3 c. water
  • 1 Dr. McDougall’s “Chicken” Flavor Ramen
  • 1 packet Miso Cup
  • 1/2 pkg extra firm tofu, crumbled
  • 1-2 tsp Braggs Liquid Aminos
  • 1 tsp dulse flakes

I make this in a pressure cooker, as I’ve mentioned before, cook rice in your pressure cooker at your own risk.

Basically put all ingredients in the pan and stir well. Bring up the pressure. Cook for 12 min at 9000 ft, (probably 9 min at 5,000 ft, or 6 min at sea level). Turn off heat. Let pressure naturally release. When you open up the cooker the rice mixture will be pretty well compressed. Once it’s cooled, it can be cut into bars. Then the bars can be wrapped in foil. I don’t bother with forming the mixture into a rectangular pan. I’ve been able to get firmer bars by cooking everything together and not disturbing the mixture after the cooking is done. I just make a square in the middle, and usually cut 8 bars from that. Then piece together the halved, rounded edges to make 4 more bars.

You can experiment with the amount of water to make firmer, less moist bars. 3 cups makes a very moist bar, that still keeps it’s shape pretty well when cool. The ramen, miso and even tofu are absorbing some of the water, along with the rice. If you cook the rice first and then add ingredients and compress, similar to the way the Lim video shows, you’ll probably want 1 c. sushi rice to 1-1/2 c. water.

Also, some people may want more salt when they’re riding. If so you could add 1 tsp salt to the ingredients. You can also try other flavors and ingredients. Lim uses cheese in his. I’ve tried using Daiya in my rice bars and haven’t been very happy with that flavor during rides.

This video best shows Allen Lim’s foil wrapping technique, unfortunately he’s making ham, cream cheese, and jelly croissant sandwiches.

I’m not sure about other uses for rice bars. They are pretty tasty. They might make a good school or work lunch or after workout snack.

Cowgirl beans

Vegan Month of Food Logo
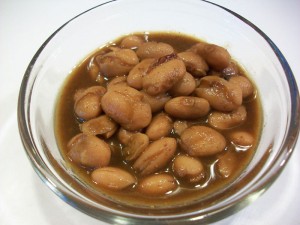
These beans reminded me of beans sometimes seen on menus as “cowboy” beans. They’re almost never vegan (though they should be), because someone thought they needed a little bacon (blech!), or pork (blech!) or chicken broth (blech!).

After cooking pinto beans in the pressure cooker, I simmered them for a couple hours over very low heat with veggie bouillon, beer, cumin, chili powder and a dried chipotle. Perfect, slightly sweet, slightly spicy pinto beans!

Cowgirl Beans

  • 3 c. Cooked pinto beans with 2-3 c. cooking water
  • 1 veggie bouillon cube
  • 1/2 – 1 c. beer
  • 1 tsp. cumin
  • 1-2 tsp chili powder
  • 1 dried chipotle pepper

Green rice and stuffed chiles

Vegan Month of Food Logo

Yesterday I made a vegan version of one of my favorite recipes from Madhur Jaffrey’s World Vegetarian, “Rosario Guillermo’s Green Rice with Stuffed Poblano Chiles (Arroz Verde con Chiles Relleños)”. I used a pressure cooker. I’m sure cooking rice with soy milk in your pressure cooker will void your warranty and send you to hell, so if you’re worried about either of those things you should probably cook this conventionally.

Here are the ingredients. (Tofu is not in the original recipe.)

  • 2 c. parsley leaves, loosely packed
  • 1/2 medium onion (chopped as required by your blender)
  • 3 garlic cloves (chopped as required by your blender)
  • 1/3 c. water
  • 4 roasted poblano chiles
  • 2 oz. vegan cheese
  • 3 oz. extra firm tofu, crumbled (optional)
  • 1 tsp olive oil (recipe calls for 3 Tbsp. canola or peanut oil)
  • 2 c. long grain rice
  • 1-1/2 tsp. salt
  • 3 c. soy/almond/rice milk

The hardest part of this recipe is prepping the chiles and parsley. I usually buy chiles already roasted from the farmer’s market, but shopping for ingredients at 8pm on a Sunday night limited my choices. I was lucky to find poblanos at all, but it’s that time of year!

The night before, while the chiles were roasting under the broiler, I worked at cleaning and de-stemming the parsley. I did a thorough job of cleaning (the parsley I bought was very muddy) and a less thorough job of de-stemming. Peeling the chiles isn’t too hard after they’re roasted. Depending on your sensitivity to capsaicin you may want to wear gloves for that job. I didn’t bother.

The next day, I put a little oil in the pressure cooker and started heating that over medium heat. Then put the parsley, onion, garlic and water in the blender and pulverized it. I added the rice to the oil and toasted it for 5-10 minutes. (If you think you see short grain rice in there, you do. I forgot to check my rice supply before shopping and had to use 1 c. long grain brown rice + 1 c. sushi rice.) While the rice was browning, I crumbled the tofu and mixed with Daiya shreds. Cheddar would probably be a better choice, but mozzarella is what I had, and the color matches the tofu.

Stirring the rice occasionally so that it browned, rather than blackened, I “stuffed” the chiles with the tofu and cheese mixture. “Stuffing” basically amounts to laying the chile flat, inside up, putting some cheese on it and folding it over … if you’re lucky. In my case, I put some cheese on a piece of chile and then reassembled the remaining pieces into a chile-like shape.

Once your rice is browned you should turn down (or turn off) the heat under the rice pan and let it cool a little. Otherwise, you’ll have green stuff splattered all over your stove like I did. The next step is to pour the parsley mixture into the rice. You could cook for 4-5 minutes. Since I was using the pressure cooker I just let it warm up, then added 1-1/2 c. of soy milk. I should have added all 3 cups, or 1-1/2 c. soy milk + 1-1/2 c. water. I was worried that there was already too much liquid so I cut it down.

Then I brought the pressure up and cooked it over low heat for about 15 min. (At sea level, if you were cooking without a pressure cooker you’d probably want to cook the rice for about 25 min.) After the pressure naturally released, I opened the cooker to find that the rice was a little dry. I added some water, a bit too much as it turned out, and placed the chiles on top. Then brought the pressure up, turned the heat off and let the pressure come down naturally again.

Besides the rice being a little overcooked, this was pretty tasty. Some of the rice on the bottom of the pan will probably be brown no matter what cooking method you choose. The rice is surprisingly rich, with 1-1/2 to 2 c. of soy milk. I don’t think it’s a bad idea to cut the soy milk with half water from the start.

[Sorry about the poor photos. I took them with a video camera.]